
Want to publish and upload iSpring based HTML5, xAPI and SCORM Content on WordPress? Follow this step by step guide, which helps you upload your iSpring content on WordPress website.
Table of Content
- Export Content with xAPI Reporting
- Export Content with SCORM Reporting
- Export Content without Reporting
- Upload Content Package
iSpring is a rapid eLearning course building tool, works with Microsoft Powerpoint.
Requirements:
- WordPress Website
- iSpring Content zip file
- Plugin: GrassBlade xAPI Companion
- GrassBlade Cloud LRS or GrassBlade LRS for reporting.
Export Content with xAPI Reporting
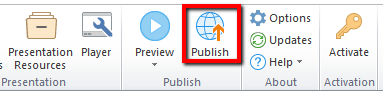
Step 1:
To get an uploadable .zip file, Click Publish in iSpring Suite.
Step 2:
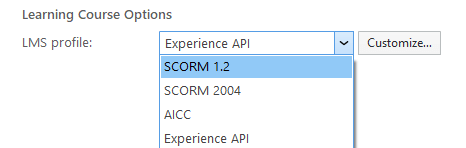
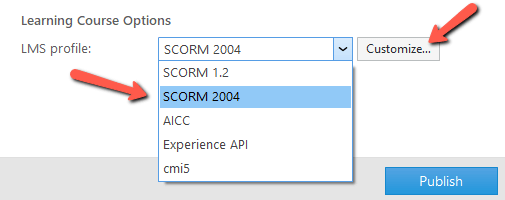
Select the LMS option and choose Experience API (xAPI) as LMS profile. You can check the “Use iSpring Play app” option if you want the content to play in iSpring app on mobile, else, uncheck to play it in the browser.
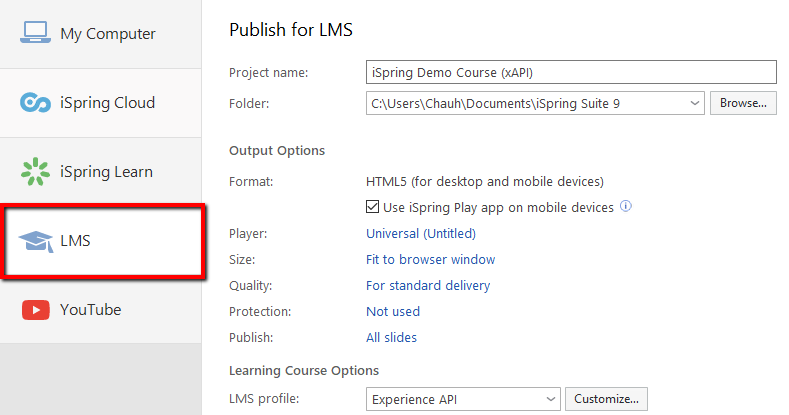
Step 3:
Click Customize option to make changes in your LMS profile settings.

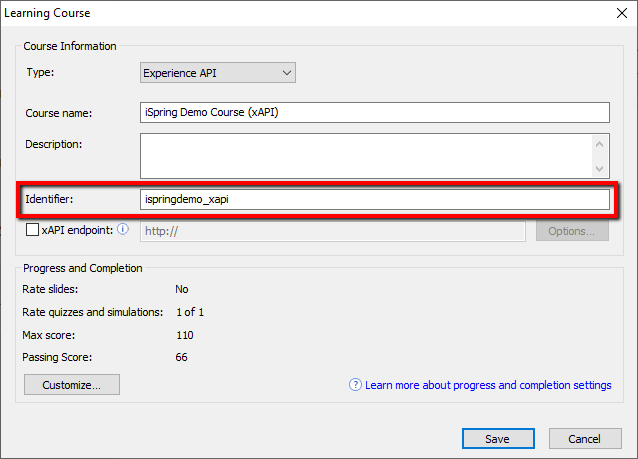
Step 4:
In the Identifier field, enter your content identifier. It is usually a short name or content number. Do not use spaces, but use underscores or dashes between words if needed.
The GrassBlade LRS will use this data to track your content statement. So, make sure it is unique. If you use the (random) default ID, it will work but will be challenging to identify your contents in the LRS statement list.
Note: If you update your xAPI Content in the future, make sure you use the same Identifier when you update your xAPI Content within the content.
Step 5:
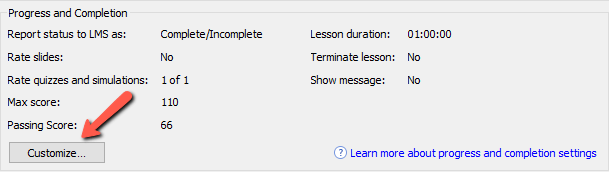
Click Customize in the Progress and Completion section to make a change in xAPI Content tracking and quiz marks.
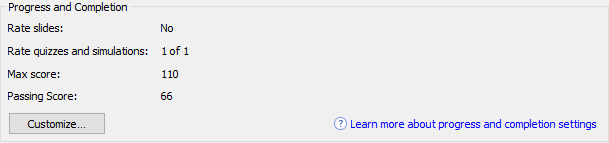
Step 6:
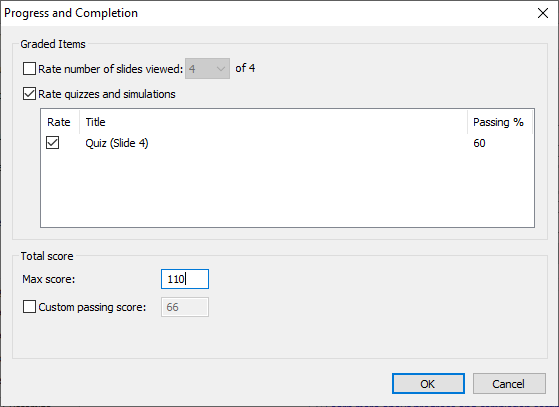
In xAPI Content, “Progress and Completion” settings, you have several settings:
a: Max Score: It is the max score for overall xAPI Content. If you are using quiz, it might be best to set it to the max score obtainable on the quiz. This will be the sum of points on all questions.
b: If you check “Rate number of slides viewed” option, the score will be awarded based on a number of slides viewed.
c: If you check “Rate quizzes and simulations,” score is based on the quiz score. If the max score on the quiz and max score on xAPI Content you set above is different, the scores will be scaled by keeping the percentage as same.
d: If you check both the above options, half of the max score weightage will be given to slides viewed, and half of it will be based on quiz score.
e: Custom passing score: This will set the passing score (out of max score) to pass the xAPI Content. If you are using quiz based scoring, it is best not to override it here.
Step 7:
Save all the above settings and Click Publish.
For Tracking Feature, you have to connect GrassBlade xAPI Companion plugin with some LRS, you can use GrassBlade Cloud LRS or Simple GrassBlade LRS for better results.
Export Content with SCORM Reporting
GrassBlade xAPI Companion also supports SCORM 1.2 and all the editions of SCORM 2004. However, we recommend exporting your content as an xAPI package for better reporting and future requirements.
If you still want to export with SCORM reporting settings, just replace settings with these options in the above process.
Recommended Settings for SCORM 1.2
Step 2:
In the LMS Profile option select SCORM 1.2 and click the customize button.
Step 3:
On this screen, click the customize button.
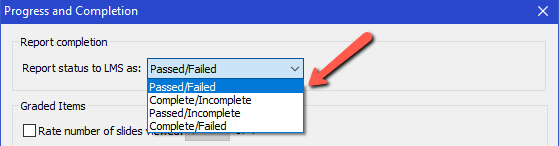
Step 4:
In “Report status to LMS as” select Passed/Failed option and do other settings as per need.
Now save and follow the above process.
Recommended Settings for SCORM 2004
Step 2:
In the LMS Profile option select SCORM 2004 and click the customize button.
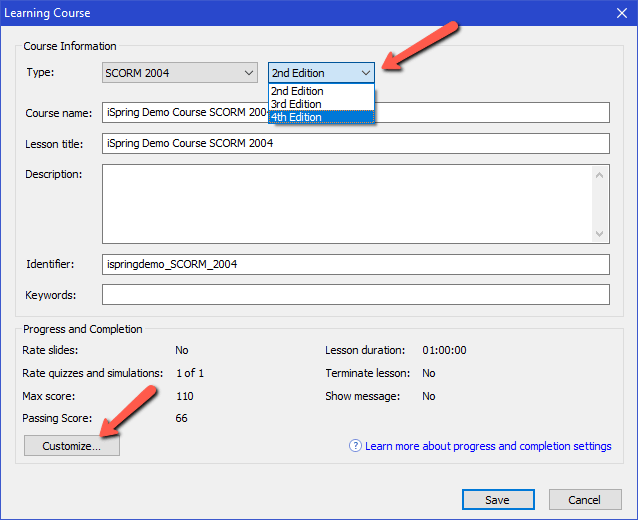
Step 3:
On this screen, select the SCORM 2004 Edition and click the customize button to do the needful reporting settings.
Now save and follow the above process.
Export Content without Reporting
If you do not want any reporting, then you can export content as HTML5 package only.
Step 1:
To get an uploadable .zip file, Click Publish in iSpring Suite 9 section.
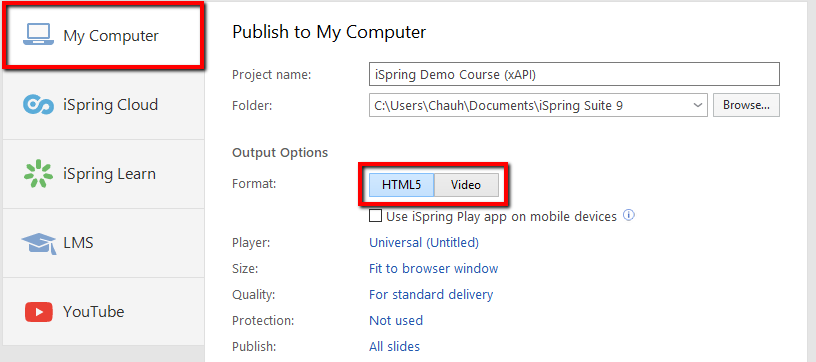
Step 2:
Now click My Computer and select HTML5 option in publish settings.
Step 3:
Click Publish.
After this, you get your .zip file to upload on WordPress website.
Upload File
Step 1:
To upload your xAPI Content on WordPress, you need to install GrassBlade xAPI Companion.
Step 2:
Use the available upload methods to upload your package on WordPress.
Step 3:
To add Content on any page, post or LMS lesson, follow this doc.
We hope you find this information usefull, for more latest and quick updates, join us on Facebook and Twitter.
How this system works?
Hi Alex,
The process is very easy and simple.
1. Upload your package,
2. Add it to any page using a short code, meta box, or Gutenberg block.
3. Content to any or GrassBlade Cloud LRS to get reporting data.
Regards,
Hello.
We have been experiencing some technical difficulties with XAPi and the completion button with Tutor LMS. We have done all the advisable solution we could find on the support page in your website and other forum but all in vain.
When some one completes the course i belive the button enable mark on completion should be active and clickable so the student can proccess with further activityes else the system should know that the course is completed and add percentage progress but its not working.
Now I would like to know if there is a common error on xApi with Tutor LMS? If yes how do we fix and get the lms to work smoothly? we have tried all options advisable by your support and none of them solve our problem.
I have a attached the screen recorded video file to show what situation we are facing.
We need your Assinstance to overcome this challenge.
p.s. our courses are designed using the iSpring authoring tool with the quiz embeded inside the presentation. Once the quiz is passed and we hit the close button, the mark as complete function does not work.
Yes, it should work as expected if you have setup Completion Tracking correctly. Please feel free to reach out to our support if the issue is still unresolved.