LRS may send emails for various purposes. However, currently, it primarily sends an email for email reports. If your server doesn’t send emails you might want to configure the SMTP settings so that LRS can send these emails. Please follow this step-by-step guide.
You can use any SMTP service, we will be talking about a few of them:
LRS Configuration
Step 1:
Find these details of your SMTP provider.
- SMTP Server
- Port
- Username
- Password
Now, we have to enter these details in LRS.
Step 2:
In GrassBlade LRS, Go to Configure > Integrations > Email and enter the above details you have collected.
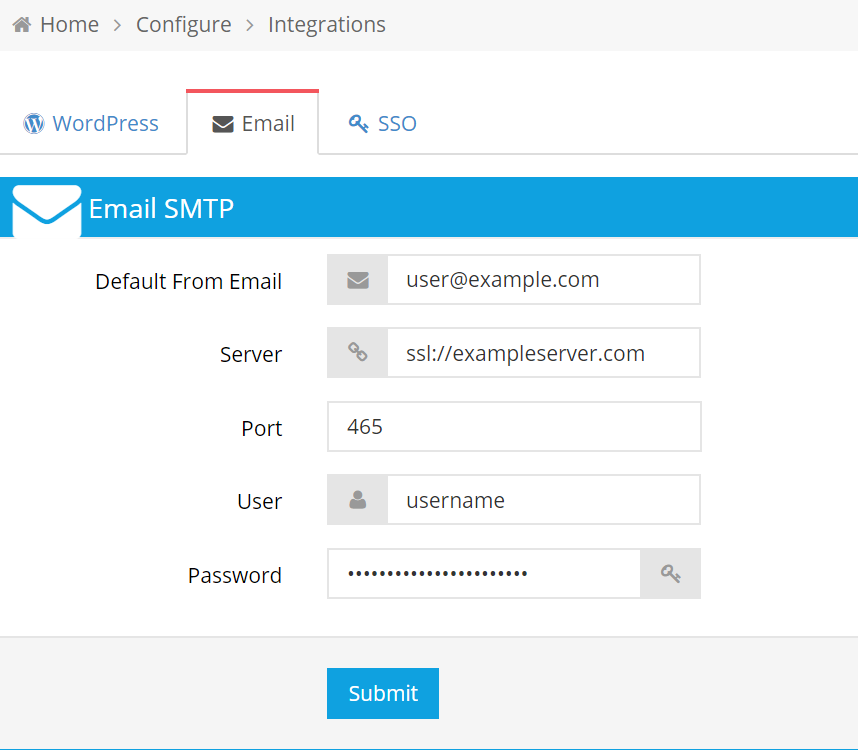
a. Default from Email: Enter the email you want to show as sender email.
b. Server: User ssl:// before your server URL if you’re using an SSL. If you’re using TLS then enter URL without ssl://.
c. Port: 25, 2525, 587 as TLS ports and 465 as SSL port.
Step 3:
Click Submit button, to save settings.
Your Email SMTP configuration is ready.
Read: How to Create Filtered Reports? and How to Email Reports [PDF/CSV]?
Gmail
Note: We don’t recommend using GMAIL for SMTP. Gmail has several restrictions which will cause issues both during and after setup.
If you still want to test, you can use the following details:
SMTP Server: ssl://smtp.gmail.com
Port: 465
User: Your Gmail Id
Pass: Gmail Password
You might need to enable less secure apps: https://www.google.com/settings/security/lesssecureapps
You might also need to unlock account access before trying: https://accounts.google.com/DisplayUnlockCaptcha
Learn More: Check Step 2 in this Gmail Support Doc.
SendGrid
For SendGrid users, use the following details:
SMTP Server: ssl://smtp.sendgrid.net
Port: 465
User: Your SendGrid username (not the email)
Pass: SendGrid Password
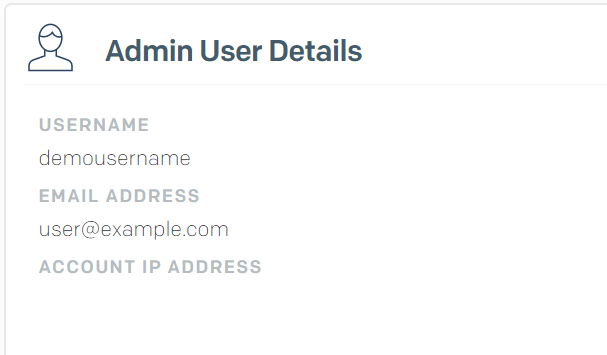
If you do not know or forgot your SendGrid username, you can find it in the Admin User Details tab under Dashboard or in Setting > Account Details or just click here.
Amazon AWS SES
Note: If you’re using a free account, then you have to verify your sender and receiver email first.
Step 1:
Log on to Amazon AWS SES (SES Management Console).
Step 2:
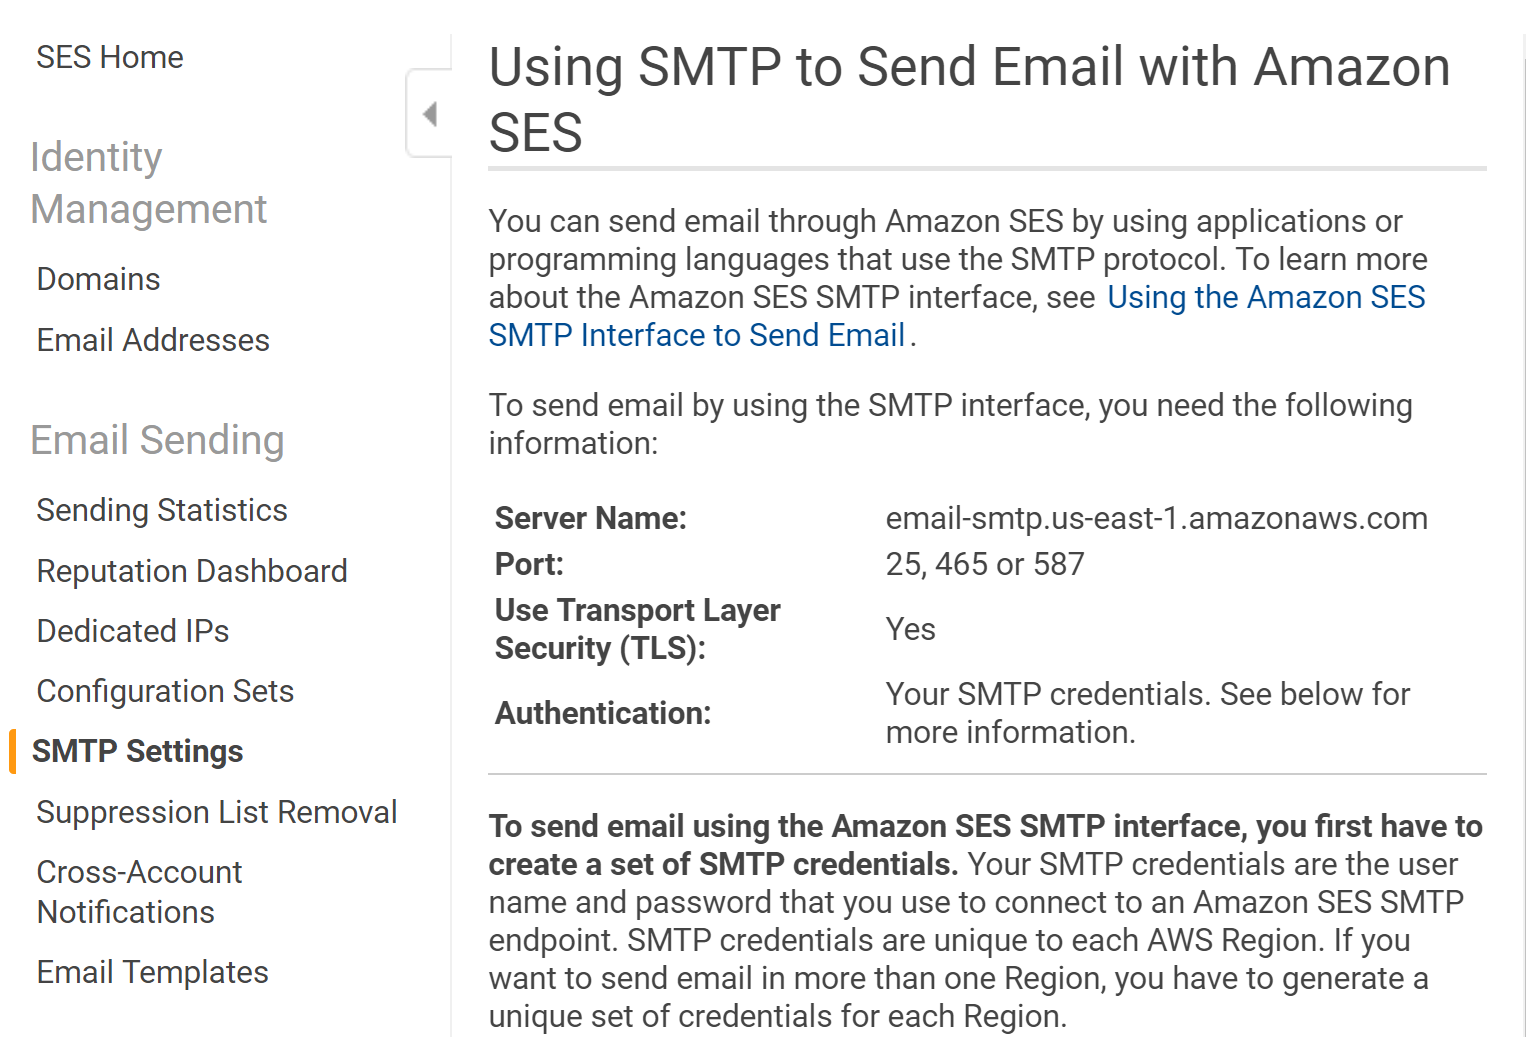
Go to SMTP Settings Copy Server Name and Port details.
Step 3:
Now, you have to create your SMTP Credentials and save them.
Read: How to Obtain Your Amazon SES SMTP Credentials?
Step 4:
If you’re using a free account then you can send mails to only verified emails, if you’re using a full (paid) account then you can send mails to any email.
Learn More: How to verify Emails?
Now, you have :
a. Server Name (Host)
b. Port
c. Username
d. Password.
You can use these details in LRS configurations.
Learn More: Getting Started and Setting up AWS SES.
If you’re still facing any problems, feel free to contact us.