After creating your course, there are a few settings to use, so the Grassblade LRS is updated and the course is marked complete on the LearnDash course or lesson page.
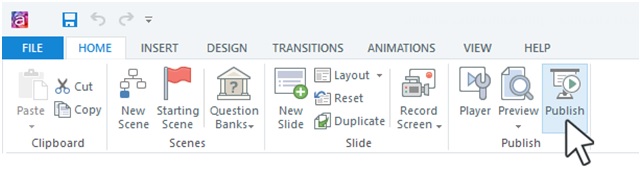
Step 1: Begin Publish.
When you’re ready to publish your course, go to the HOME tab on the Storyline ribbon and click PUBLISH
Step 2: Enter Course Information
When the PUBLISH window appears, select the LMS tab on the left.
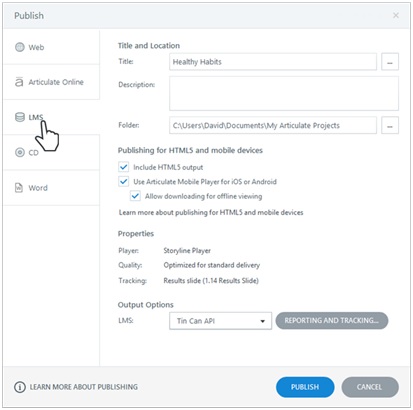
2.1: Enter the course TITLE that you want to appear in your published course.
2.2: You can enter a short course description in the Description field (optional). Your LMS system may or may not read the description.
2.3: Identify the folder where you want your published output to be saved. The default is the My Articulate Projects folder. Remember to use a local drive to avoid publish issues.
2.4: Decide if you want HTML5 or Mobile output
2.5: In the Output Options section, select Tin Can (xAPI) as the LMS type.
Step 3: Reporting Tab
Click the REPORTING AND TRACKING button to open the settings page.
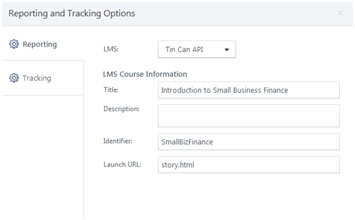
3.1: Double-check the course title, which was input on the previous screen and carried to this screen.
3.2: In the Identifier field, enter your course identifier. This is usually a short name or course number. Do not use spaces, but use underscores or dashes between words if needed. This is the field the GrassBlade LRS will use to track your course statements, so make sure it is unique. If you use the (random) default ID, it will work but will be difficult to identify your courses in the LRS statement list.
3.3: If you update your course in the future, make sure you use the same Identifier when you update your Grassblade xAPI content within the course.
3.4: The Launch URL is usually story.html.
Step 4: Tracking Tab
The Tracking Tab is where you set the options for recording either completion or pass/fail criteria for your course.
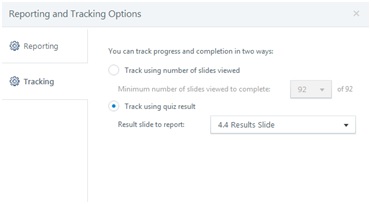
4.1: If you want to track complete/incomplete status, choose the “Track using number of slides viewed” option. You may want to choose a number smaller than your maximum because in many courses there are optional screens or screens that are feedback that a user doesn’t see. If you choose all slides and one is not viewed, the course will never be marked complete.
4.2: If you want to track pass/fail status, choose the “Track using quiz result” option. Select your results slide that is already setup for your quiz.
Step 5: Create your EXIT button ()
This assumes you launched the storyline module in a “new window”.
On the last page of your storyline module, you can use an EXIT button to exit the module and close the window.
The learner can also click the X in the corner of the screen and simply close the window. They will be returned to the LearnDash lesson page, but the completion icons will still be grey. That can be confusing to some since they just completed the lesson.
Marking the course complete: The GrassBlade/LearnDash/xAPI interface will mark your course as complete if all the criteria have been met. You will need to refresh the LearnDash lesson screen so that it updates the LearnDash completion icons.
Assuming you opened your course in a new window (set in the xAPI settings when you upload your content), you can automatically refresh the screen as you close the window and return to the Course page you launched from.
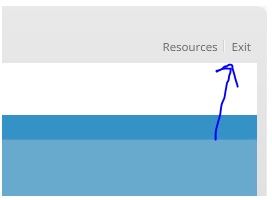
EXIT OPTION 1 – EXIT TAB ON COURSE PLAYER
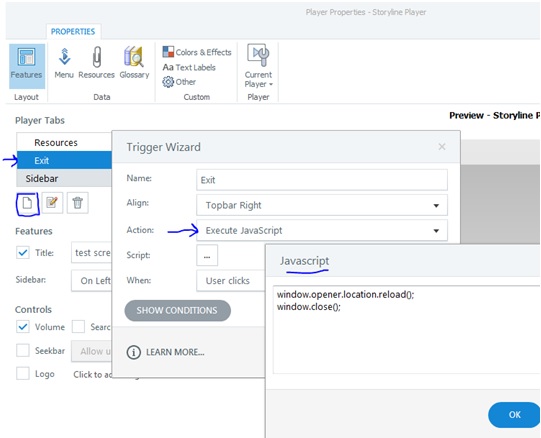
• In the player options of Storyline, Add a new Player Tab titled “EXIT”
• Execute the javascript when the learner clicks the EXIT tab
window.opener.location.reload();
window.close();
EXIT OPTION 2 – CREATE AN EXIT BUTTON
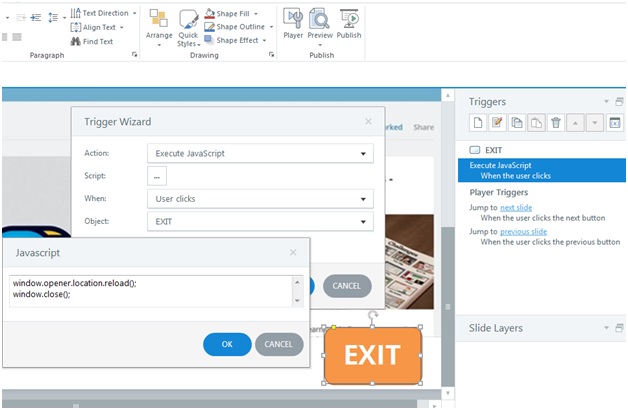
- Create an EXIT button on your final or Congratulations screen.
- Create a trigger attached to the EXIT button to execute the following javascript:
window.opener.location.reload();
window.close();
This will refresh the LearnDash course page as the window closes. The Mark Complete button will disappear and the course is marked complete.
Step 6: Publish your Course
Click “PUBLISH” and you will get a zip file packaged with your content that you can upload to WordPress using GrassBlade xAPI Companion.
Step 7: Uploading your Course